
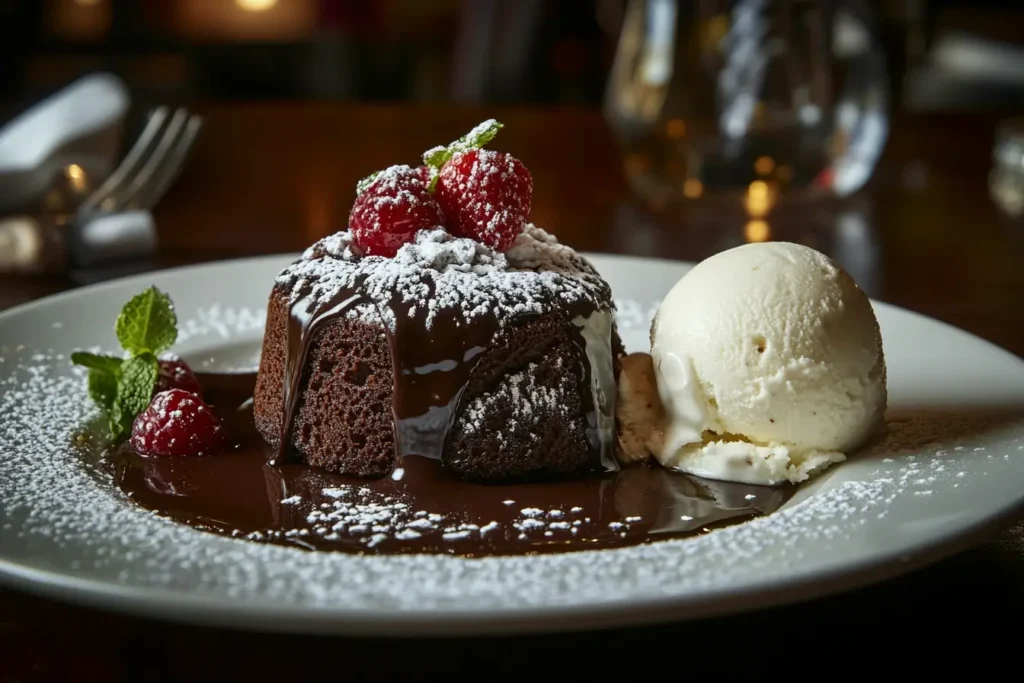
Picture this: You’re sitting down to a warm, freshly baked Chocolate Lava Cake, the kind that melts in your mouth the second you take a bite. As your spoon cuts through the outer crust, a river of gooey, rich chocolate oozes out, making everything feel right in the world. Honestly, there’s just something magical about a dessert that combines that perfect balance of crunchy and gooey, all wrapped up in a beautiful, indulgent little cake.
Whether you’re celebrating a special occasion, planning a romantic dinner or simply satisfying a serious chocolate craving, Chocolate Lava Cakes never fail to impress. These little cakes are more than just dessert—they’re an experience. The anticipation as you cut into them, the oozy surprise inside and of course, the intense chocolate flavor that satisfies even the deepest sweet tooth.
And let’s not forget how fun they are to make! With just a few simple ingredients, you can create a dessert that looks and tastes like it came straight out of a five-star restaurant. If you’ve ever tried making Chocolate Lava Cakes at home and found yourself struggling with that perfect gooey center, don’t worry—you’re not alone. But with the right tips and tricks, you’ll be serving up flawless lava cakes in no time!
The 5 Secrets to Achieving the Perfect Chocolate Lava Cakes
Making the perfect Chocolate Lava Cakes is a delicious challenge, but with these five key secrets, you’ll be serving up molten chocolate perfection every time. Whether you’re a beginner or a seasoned baker, these tips will help you create the ultimate gooey center that makes every bite irresistible.
Secret 1: Use High-Quality Chocolate
If you’re aiming for the best Chocolate Lava Cakes, the chocolate you choose makes all the difference. Opt for dark or semi-sweet chocolate with a cocoa content of at least 70%. Why? Higher cocoa content delivers a deep, rich flavor and smooth texture, which is key for that indulgent molten center.
What to Avoid:
Stay away from chocolate chips. While they’re great for cookies or muffins, they can ruin the texture of your lava cakes. Chocolate chips tend to hold their shape instead of melting smoothly, which can mess up that gorgeous molten center.
Secret 2: Perfect the Baking Time — Underbake, But Don’t Overdo It
One of the most important things to know about Chocolate Lava Cakes is that you need to slightly underbake them to get that gooey center. Typically, you’ll want to bake them for 10-12 minutes. But, remember—every oven is different! Factors like ramekin size and batter thickness can affect baking time.
How to Know It’s Time to Take Them Out:
To make sure you’re on the right track, try the “wiggle test.” Gently shake the ramekin—if the edges are set but the center still jiggles slightly, you’ve got it! If the center is firm, pop them back in for another minute or two.
Secret 3: Room Temperature Ingredients Are a Must
For smooth, well-blended batter that bakes evenly, all your ingredients—eggs, butter and chocolate—need to be at room temperature. Cold ingredients can cause lumps and uneven texture in your batter, which could affect the outcome of your lava cakes.
Pro Tip:
Take the eggs out of the fridge about 25-30 minutes before you plan to bake. This simple step ensures your ingredients mix together seamlessly.
Secret 4: Don’t Forget to Grease the Ramekins
When it comes to Chocolate Lava Cakes, one of the worst things that can happen is for them to stick to the ramekin. That’s why it’s crucial to butter your ramekins and dust them with cocoa powder (or flour). This helps the cakes pop out easily without breaking the delicate outer crust.
Alternative:
For an even easier release, you can line your ramekins with parchment paper. Just cut it to size and you won’t have to worry about sticking!
Secret 5: Serve Right Away — Hot and Fresh
There’s no question about it—Chocolate Lava Cakes are best when they’re served hot and fresh out of the oven. The molten center should flow out as soon as you cut into them. So, be ready to flip them onto a plate immediately after baking.
Serving Suggestions:
For the ultimate treat, serve your lava cakes with a scoop of vanilla ice cream, some fresh berries or a dollop of whipped cream. You can even sprinkle powdered sugar on top for that extra touch of elegance.
With these five secrets in hand, you’ll be on your way to making the most delicious Chocolate Lava Cakes with the perfect molten centers every time. Happy baking!
Bonus Tips for the Ultimate Chocolate Lava Cakes
Ready to take your Chocolate Lava Cakes to the next level? Here are some extra tips that will make your baking experience even easier and the results even more delicious!
1- Make-Ahead Tips
Can you prep your Chocolate Lava Cakes ahead of time? Absolutely! You can prepare the batter a day in advance and store it in the fridge for up to 24 hours. This not only saves you time, but it also allows the flavors to meld together. When you’re ready to bake, just take the batter out of the fridge and give it a quick stir before filling your ramekins.
What to Keep in Mind:
Since the batter is cold, you may need to add a minute or two to the baking time. Just keep an eye on them and do the “wiggle test” to get that perfect molten center.
2- Freezing Lava Cakes
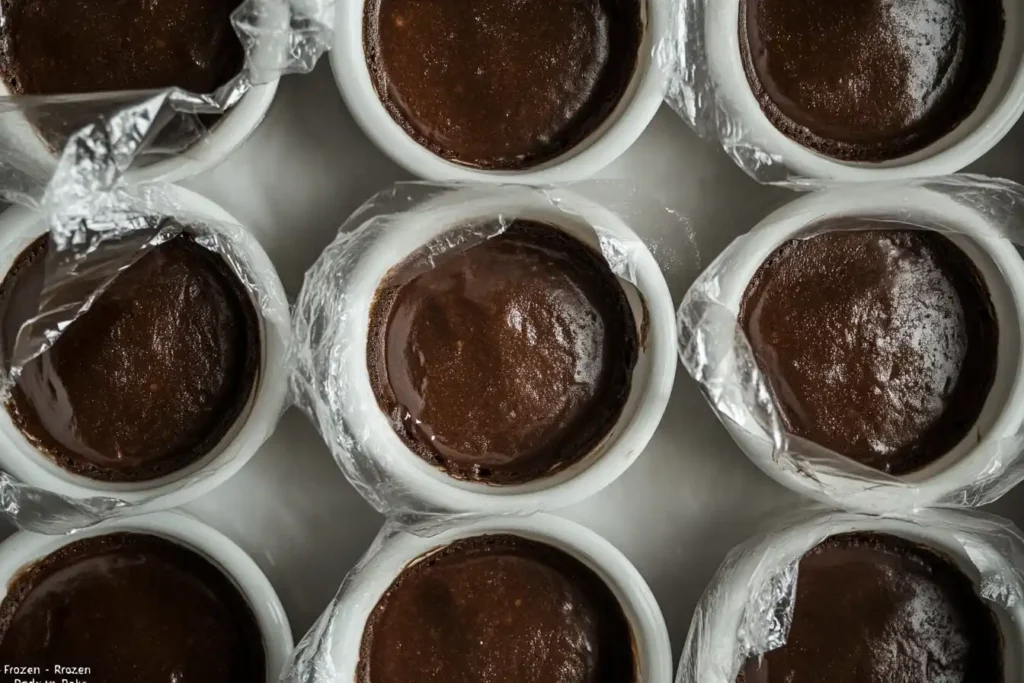
Need a make-ahead option for when you’re entertaining or in a pinch? You can freeze your unbaked Chocolate Lava Cakes! Just spoon the batter into your greased ramekins, cover them tightly and freeze. When you’re ready to bake, pop them straight from the freezer into the oven.
Tip:
You’ll need to add about 3-5 extra minutes to the usual baking time to account for the cold batter. Trust me, it’s worth the wait when you cut into that gooey center!
3- How to Experiment With Flavors
Once you’ve mastered the classic Chocolate Lava Cakes, it’s time to get creative! There are so many fun ways to switch up the traditional recipe and experiment with new flavor combinations.
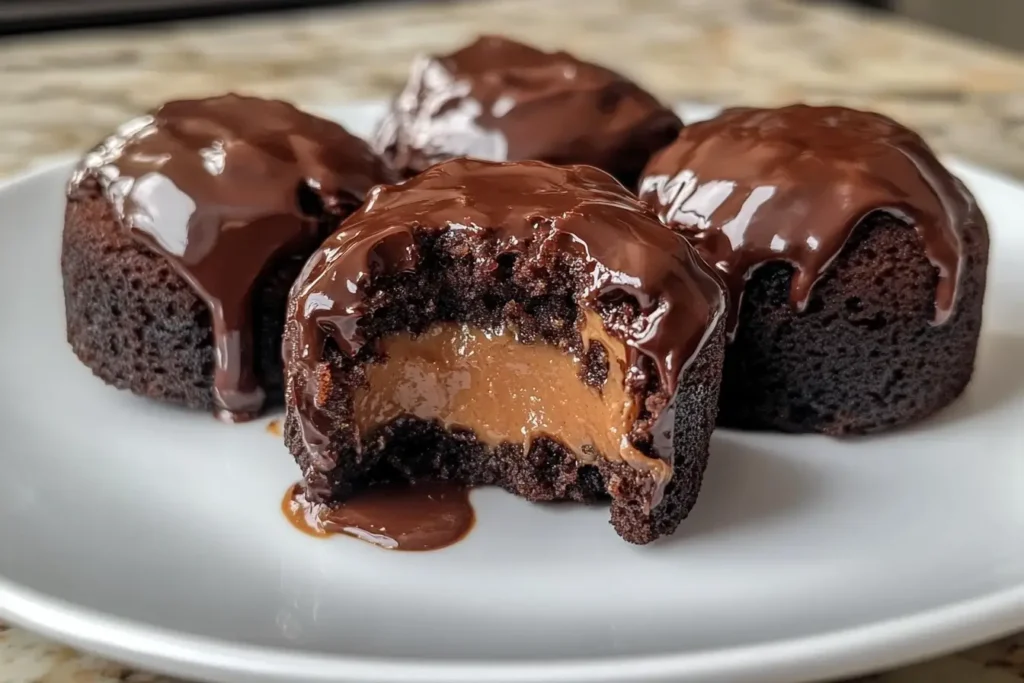
- Peanut Butter Lava Cake: Add a spoonful of peanut butter to the center of the cake before baking. When you cut into it, the rich peanut butter blends perfectly with the molten chocolate center. It’s like a match made in dessert heaven!
- Orange Zest or Espresso: Infuse the batter with a little orange zest for a citrusy twist or add a shot of espresso for a bold, coffee-flavored version. You can even mix and match flavors to make your own signature lava cake!
- Mint Chocolate Lava Cake: A hint of mint in the batter and a few chocolate chips for extra gooey goodness can turn your Chocolate Lava Cakes into something magical.
4- Ramekin Alternatives
Don’t have ramekins? No worries! There are plenty of other options for baking Chocolate Lava Cakes. You can use muffin pans, small oven-safe cups or even silicone molds. Just remember, different baking vessels might affect the baking time and texture.
Adjustments to Keep in Mind:
- Muffin Pan: If you’re using a muffin pan, the baking time will likely be shorter since the batter is spread over a larger surface. Start checking around 8 minutes.
- Small Cups or Molds: With small, shallow cups, you may need to decrease the baking time by 1-2 minutes to prevent overbaking.
These bonus tips will help you make the best Chocolate Lava Cakes that are not only easy to prepare but can also be customized to suit your tastes and schedule. From freezing them for later to adding unique flavors, the possibilities are endless. Happy baking and don’t forget to enjoy every last bite of that molten chocolate goodness!
Common Mistakes to Avoid (And How to Fix Them)
Making Chocolate Lava Cakes may seem easy, but there are a few common mistakes that can ruin your perfect molten center. Let’s break them down so you can avoid these pitfalls and make sure your lava cakes are a hit every time!
Overmixing the Batter
It’s tempting to get in there and mix the batter until everything is perfectly smooth. But here’s the deal: overmixing your batter is a Chocolate Lava Cake no-no.
When you overmix, you create too much air, which can lead to a dense, tough cake instead of that light, airy texture we’re all after. You want a soft, tender outer layer with a gooey center that oozes when you cut into it. Overmixing ruins that contrast.
How to Fix It:
Mix the ingredients until they’re just combined. A few lumps are okay! The goal is to keep the texture light and airy, which will allow for that perfect molten center when baked.
Baking for Too Long
The key to a perfect Chocolate Lava Cake is the balance between the set outer layer and the soft, molten center. If you bake it for too long, the center can firm up and your lava cake will lose its signature gooeyness.
How to Avoid Overbaking:
Typically, Chocolate Lava Cakes should bake for about 10-12 minutes, depending on your oven and ramekin size. Once the outer edge is set but the center still jiggles when you shake the ramekin, it’s time to pull them out.
Remember, the center should stay soft and flow when you cut into it. So, always keep a close eye on the clock and do the “wiggle test.”
Not Greasing the Ramekins Properly
Nothing’s worse than the moment you flip your Chocolate Lava Cake onto the plate and it gets stuck in the ramekin. The outer layer of your cake can break, leaving you with a crumbled mess instead of a beautiful, intact lava cake. This happens when you don’t grease the ramekins properly.
How to Fix It:
Generously butter and dust your ramekins with cocoa powder (or flour) before adding the batter. This ensures that the cakes slide out easily once they’re done baking.
Alternatively, for a non-stick option, you can line the ramekins with parchment paper, which works just as well to prevent sticking.
By avoiding these common mistakes, you’ll be well on your way to mastering the art of making Chocolate Lava Cakes that have the perfect balance of textures—crisp on the outside and gooey on the inside!
FAQs About Chocolate Lava Cakes
If you’re just getting into baking Chocolate Lava Cakes, you might have a few questions. No worries! I’ve got the answers to some of the most common queries, so you can create perfect lava cakes every time.
1- Why is my lava cake no lava?
It’s because you may have overbaked it. When you bake your Chocolate Lava Cakes too long, the molten center can firm up and you lose that gooey chocolate middle.
How to fix it: Aim to slightly underbake your cakes. Bake them for 10-12 minutes and when the edges are set but the center still jiggles, it’s time to pull them out.
2- What is the difference between molten cake and lava cake?
The terms are used interchangeably, but lava cake typically refers to a chocolate-filled molten cake. Both describe cakes with a gooey, molten center, but “lava cake” specifically emphasizes the flowing chocolate.
For the most part, though, people use both names for the same cake—whether it’s chocolate or another flavor inside.
3- What is on the inside of a lava cake?
The inside of a lava cake is filled with melted chocolate. That’s the gooey center you’re after! Some recipes also add butter or heavy cream to achieve the perfect consistency, but the main star is always the molten chocolate.
Pro Tip: You can mix it up and add other fillings like peanut butter or Nutella for a fun twist on the classic.
4- What can I use instead of ramekins for lava cake?
You can use other oven-safe cups or small baking dishes. Just make sure they’re sturdy enough to handle the heat. Muffin pans, small bowls or silicone baking molds work well as alternatives.
Adjustment Tip: If you’re using something other than ramekins, make sure to check the baking time, as different containers might affect how quickly the cakes bake.
5- Can you use a muffin pan instead of ramekins?
Yes! You can use a muffin pan to make mini Chocolate Lava Cakes. They’re perfect for portion control and serving at parties.
Adjustment Tip: Since muffin pans are usually wider than ramekins, start checking your cakes at the 8-minute mark. You may need to adjust the baking time slightly.
6- How to tell when lava cake is done?
Use the “wiggle test” to know when your lava cake is done. Gently shake the ramekin (or muffin pan) when the baking time is almost over. If the center jiggles but the edges are set, you’re good to go!
Bonus Tip: The center should remain soft and runny, so trust your eyes and the wiggle test!
Now that you have the answers to these common questions, you’ll be ready to bake Chocolate Lava Cakes that are sure to impress! Enjoy your delicious creations!
Conclusion: Mastering the Art of Chocolate Lava Cakes
Alright, friends, it’s time to take those Chocolate Lava Cakes to the next level! With the secrets, tips and tricks we’ve covered, you’re well on your way to mastering the art of baking these decadent desserts.
Try it out yourself! Once you’ve got the hang of the timing and the batter consistency, you’ll be making these molten masterpieces like a pro. Honestly, Chocolate Lava Cakes aren’t as intimidating as they might seem and trust me, they always steal the show at any gathering—whether it’s a cozy dinner or a big celebration. They’re the kind of dessert that makes everyone think you’re some sort of baking genius (even if you’re just following a few simple steps).
And hey, don’t forget to share your baking adventures! Whether you added a fun twist to the classic recipe or made your own adjustments, I’d love to hear about it. Drop a comment below, share your variations and let’s create a little community of lava cake lovers. We all know the best part of cooking is sharing—and those gooey Chocolate Lava Cakes? They’re worth sharing!
So, what are you waiting for? Preheat that oven and start baking your way to lava cake perfection. You’ve got this!
Print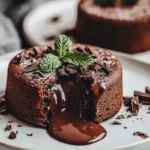
Chocolate Lava Cakes
- Prep Time: 15 minutes
- Cook Time: 12 minutes
- Total Time: 27 minutes
- Yield: 4 Lava Cakes 1x
- Category: Sweet Treats
- Method: Baking
- Cuisine: French-inspired, Dessert
- Diet: Vegetarian
Description
Rich, indulgent and irresistibly gooey in the middle, these Chocolate Lava Cakes are the perfect dessert to wow your guests (or treat yourself)! With a perfectly crisp outer shell and a molten chocolate center, they’re surprisingly easy to make and are always a hit. Get ready to serve up the most delicious, gooey chocolate experience.
Ingredients
- 4 oz (115g) dark or semi-sweet chocolate (70% cocoa or higher)
- 1/2 cup (115g) unsalted butter
- 1 cup (120g) powdered sugar
- 2 large eggs
- 2 large egg yolks
- 1 tsp vanilla extract
- 1/4 cup (30g) all-purpose flour
- Pinch of salt
- Butter (for greasing ramekins)
- Cocoa powder (for dusting ramekins)
- Optional toppings: Vanilla ice cream, fresh berries, whipped cream, powdered sugar
Instructions
Step-by-Step
- Preheat the Oven: Preheat your oven to 425°F (220°C). Grease four 6-ounce ramekins with butter and dust them with cocoa powder (or flour). Set aside.
- Melt the Chocolate and Butter: In a heatproof bowl, melt the butter and chocolate together. You can do this over a double boiler or in the microwave, stirring every 20-30 seconds until smooth.
- Mix the Wet Ingredients: In a separate bowl, whisk together the eggs, egg yolks, powdered sugar and vanilla extract until well combined.
- Combine the Chocolate Mixture: Pour the melted chocolate and butter mixture into the egg mixture and stir until smooth.
- Add the Dry Ingredients: Sift in the flour and salt, then gently fold until just combined. Be careful not to overmix!
- Fill the Ramekins: Divide the batter evenly among the prepared ramekins, filling them about 3/4 of the way full.
- Bake: Place the ramekins on a baking sheet and bake for 10-12 minutes. The outer edges should be set, but the center should still jiggle slightly when you give the ramekin a little shake.
- Serve: Let the cakes cool for about 1 minute. Run a knife around the edges to loosen them, then flip each ramekin onto a plate. Serve immediately with your favorite toppings.
Notes
Serving Suggestions
- Top with a scoop of vanilla ice cream for an extra creamy touch.
- Add fresh berries like raspberries or strawberries to balance the sweetness of the chocolate.
- A light dusting of powdered sugar makes for a beautiful finishing touch.
- For a richer flavor, drizzle with a bit of caramel sauce.
Nutrition
- Serving Size: 1 Lava Cake
- Calories: 450 kcal
- Sugar: 40g
- Sodium: 65mg
- Fat: 28g
- Saturated Fat: 17g
- Unsaturated Fat: 8g
- Trans Fat: 0g
- Carbohydrates: 50g
- Fiber: 4g
- Protein: 6g
- Cholesterol: 150mg
Keywords: Chocolate Lava Cake, Molten Lava Cake, Gooey Chocolate Cake, Easy Dessert, Quick Chocolate Dessert, Homemade Lava Cake, Chocolate Cake Recipe
Table of Contents
More Ideas For Sweet Treats You Will Adore :